So two weeks ago, Me and my husband went on a Bahamas vacation. It was the first tim in 8 years I had flown... let me just say I am a very organized person and I planned out things to pack for this trip weeks before leaving. However the one thing I forgot to purchase was LUGGAGE TAGS!! So important and its also a very good idea to have something unique attached so that you can spot it easily!
Well i remembered what I was missing at about 3 in the morning and we were leaving for our trip at 5am... I layed there in my bed freaking out a bit. I searched my brain for ideas and what to use and BAM it came to me!!! Old iphone cases!!!! They have the perfect spot inside the case to sharpie your name, address and phone number (or tape a piece of paper inside). They are your own and personalized so that you can easily spot it! They can easily be attached through the camera hole, with a ribbon or string.
IT WORKED PERFECT!!! Me and my hubby were some of the firsts to grab our luggage and go!
Search This Blog
Showing posts with label to. Show all posts
Wednesday, March 18, 2015
Monday, January 5, 2015
What to do with your unused fireplace!
Create a new look for you unused fireplace!!!
This is what I did for mine! I am a painter, so a little more went into it. But I can give a few pointers to help you duplicate it!! I did black lines since that was the same as my fireplace. try to use the same colors as yours!
This is just some pointers for the bricks!!! Obviously painting a fire is a bit more complicated.lol :) But maybe you can just try and duplicate my colors for that.
First off on the board you need to start with drawing a box like so. This is your guidelines for bricks.
This is just some pointers for the bricks!!! Obviously painting a fire is a bit more complicated.lol :) But maybe you can just try and duplicate my colors for that.
First off on the board you need to start with drawing a box like so. This is your guidelines for bricks.
Next you add in the lines for the actual bricks, Us the actaul bricks lines for starting points for your lines. I started from the left to top.
And then the middle and next the right.
Lastly you do the bottom.
Next add in color of your bricks. you might have to go over the lines with black or whichever color you chose.
Then next after you've given your bricks color ad in the dimension of your actual bricks.
Like so.
Once youve finished those you have an "empty" fireplace instead of a board.If your not up for painting fire you could always paint some logs of wood or just a pile of hot ashes! For my ashes i splotched black and gray and then on top bright red. Good luck!
Thursday, May 1, 2014
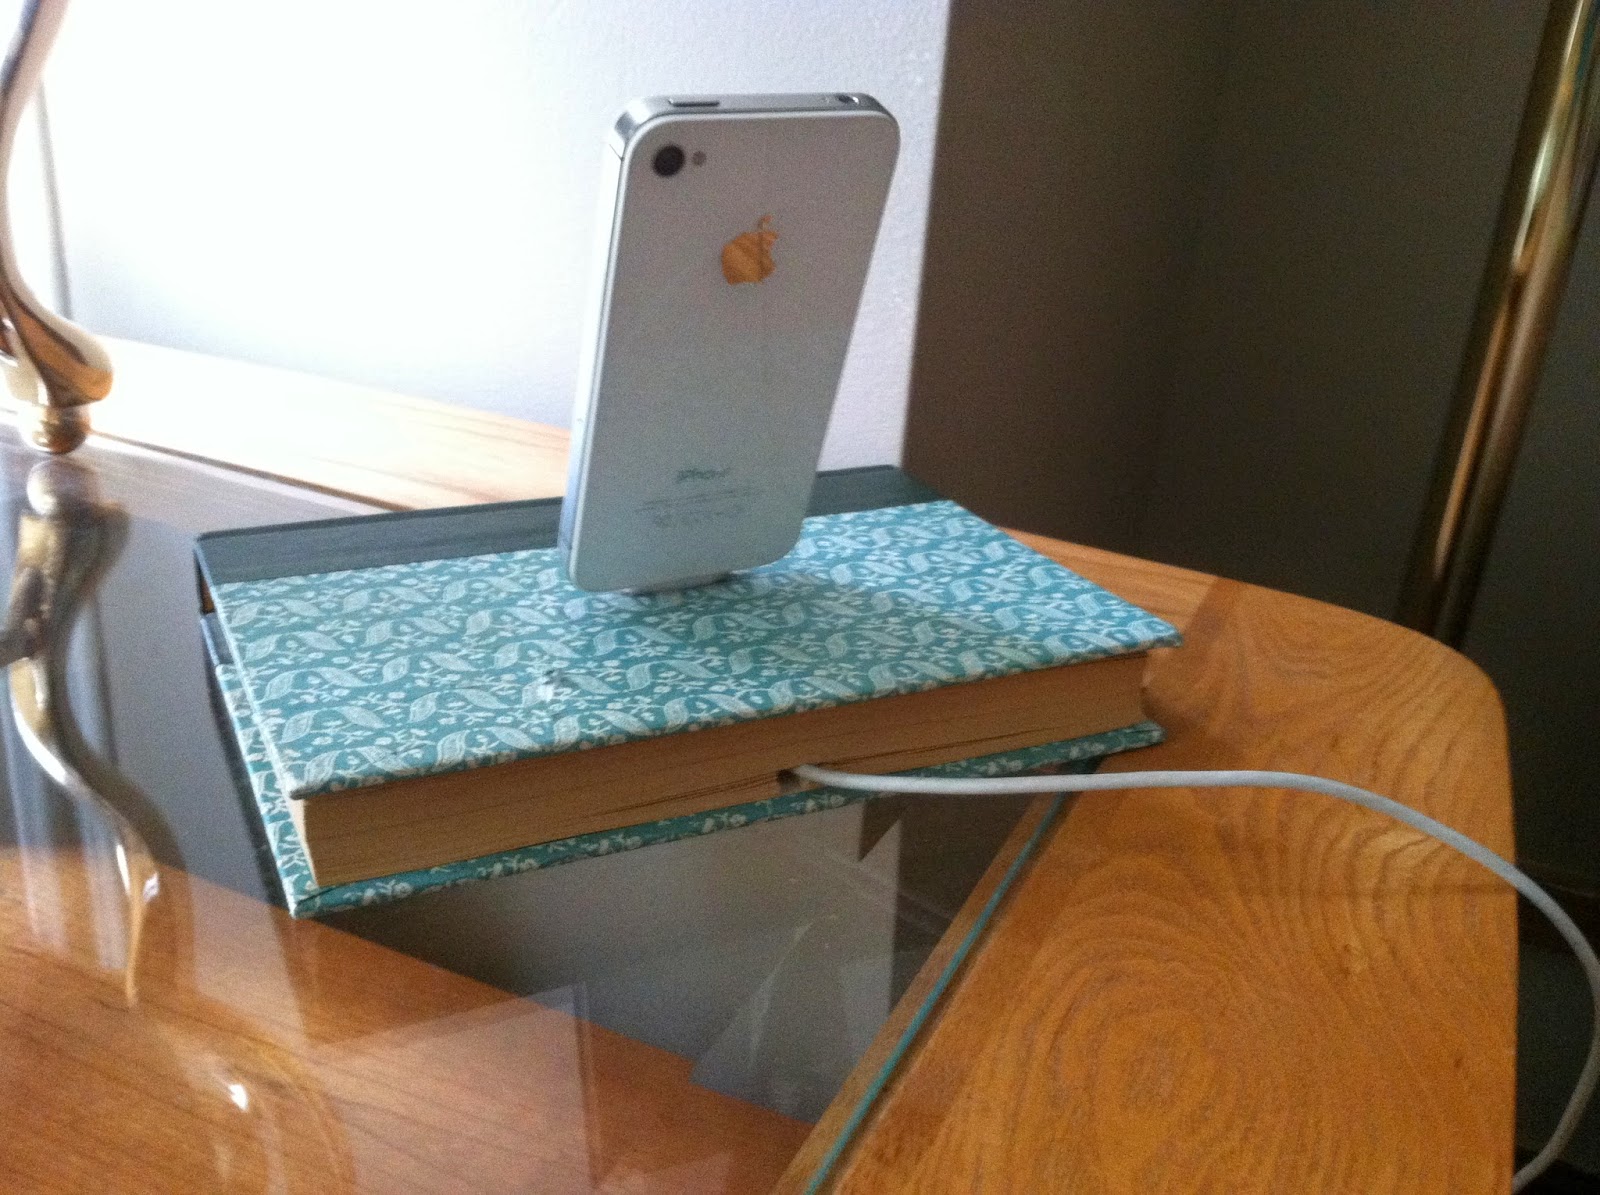
How To Make An iPhone Book Dock
Step 1.
Pick out a book! It should be at least 1.25" inches thick (the thicker the better, just more work).
Mine was an old readers digest that I had picked up for free at a library.
Step 2.
Line up your cord in the center of a page. (this is the bottom of dock) I left a couple of pages untouched on the bottom. Once you've lined it up, draw a line on each side of cord.
Step 3.
Start cutting! You will need a very sharp knife, or else it will only tear at the pages.
Keep cutting until you have enough room for the cord. (you can place some of the cord in the hole to check)
Step 4.
Place cord down once again, and then flip the pages you just cut on top of it, like so.
Step 5.
Mark with pen/pencil the end of the cord where you want the connecter to go through the book.
Step 6.
Line up connector with lines and draw around it, like so.
circle/square
Step 7.
Start cutting through, this time all the way through to the other cover and then through the cover also. (top of dock). Then feed the connector through.
Step 8.
Situate your connector at the top, try to level it out.
Step 9.
Tape down the cord inside of book. Then double check you connector on top.
Step 10.
Use elmers glue around the connector, Do not get any glue on metal, only the plastic!
Step 11.
I suggest that while its drying you have your phone connected so that it dries the way you want your phone to sit, for mine I set it on an angle.
Thats it your done!!
Tuesday, April 29, 2014
How to use narrow long closets - layout
I have a very long narrow closet that has two ends that are deep and hard to reach. I dont want just shelves on both sides because then I'm losing hanging space.
However, Recently I discovered an idea that may fix my problem by using two curved rodded shelves on both sides and still having a long clothes rod through the middle.
Heres my closet layout.
This curved rod can be bought here: Amazon link
In my design you will need 4.
I Recommend either one of these for support. My guess is that the second one will work best, however it is more expensive.
In my design you will need 8.
Image one link : Amazon
Image two link : Amazon
To attach it you will need to put up a shelf on both ends. and then screw it into the bottom so that it is hanging down as indicated in my layout. I recommend a curved shelf but a straight one will work ok too. Remember that your shelf will be holding lots of weight so you will need to make sure that it is bracketed and sturdy.
I recommend 4 of these: Amazon link
Or you could skip my whole curved idea and go with the cheaper version by using a straight rod and shelf:
Wednesday, April 23, 2014
How to Upgrade memory ( RAM ) on iBook G4
Step 1.
Turn off iBook.
Turn off iBook.
Step 2.
Slide down the two tabs on keyboard.
It should look like this:
Step 3.
Pull back keyboard, Dont completely lift up (flex cable is attached), tip it towards you so that the bottom is still touching iBook. You can then gently lay keyboard down.
Step 4.
Remove the 4 small philip screws.
Step 5.
Disconnect Airport cable.
Step 6.
Remove Airport card. There is a clear plastic tab to pull back with. Lift slightly since there is a wire keeping it from sliding, but try not to lift too much.
Step 7.
Now that you have the Airport out you can lift metal plate. Just flip over with cable still attached.
Step 8.
Your Finally to the memory card! Hard parts over!
Now just gently unclip from both sides and then slightly lift and slide out.
Step 9.
Once you have the old card out, slide the new one in by tipping the gold end down and into the slot. Use either your finger or gently use a small flat head screw driver to pull tabs out.
Make sure that the gold part of card is slid in as much as possible or else it may show up on iBook that it has less memory.
Step 10.
Test it out before putting it all back together, just to make sure memory card is in all the way.
To test turn iBook on (I recommend connecting Airport cable before turning on.) and click apple on the top left corner of screen and select "about Mac", then check if memory is what it should be.
If it says less memory than its supposed to, then turn iBook off and try lifting card slightly and pushing it in. Test once again.
Here is a before and after of sliding the card in all the way.
Before.
After
Finally, Once the memory is correct, retrace steps 8-2 backwards and put everything back where it came from.
Your done! :)
Subscribe to:
Posts (Atom)


.jpg)