Search This Blog

Wednesday, January 6, 2016

AMZ Review Trader (amazon reviews)

If you havnt heard of the latest greatest way to buy things at a discount from Amazon. Now is your chance. I have been doing amazon reviews in trade for discounted items for a while now and I gotta say it is pretty legit.

Basically sellers can put there items up on AMZ Review Trader for a discounted price and buyers can shop for these items. You are selected from many reviewers based off of your amazon profile account and the type of reviews you write. The better reviews you write with pictures and videos the better chance you have of getting selected for crazy nice items that you might even get for $1 while it's worth $100 at regular price. The catch is that it's best if you have Amazon Prime, otherwise you will more then likely  be spending just as much with shipping.

So you go shopping and request...

Then you wait to get that email the says you have been accepted!
So you go to your review profile ...


Grab that code (copy) and click buy now...


It will bring you to the item on Amazon and you add it to your cart, go to checkout and add your promotional code.


Its really awesome how it works, because regular people like you and me can get awesome new stuff, test it out and give an honest opinion (with a disclosure that we got it at a discount for unbiased review) all to get even more cool stuff and sellers have vouchers for thier product so other people can make confident purchases. You have to keep up with the reviews though or else, you can get kicked and not be able to get any more discount codes.

To join AMZ Review Trader as a reviewer click here.
To join as a seller click here.

Happy Amazoning! :)

Wednesday, May 6, 2015

Extract files from Iphone backup on computer

So I had a major headache the other day when I went to update my iPhone, backed it up and then it crashed and wouldn't let me restore it with my back up. I then had to find a way to get to my backed up files without my iPhone!!! I searched for HOURS looking for a program that wouldn't cost me 50$++. Then I discovered this developing program that costed me nothing!!

I just selected the back up I Wanted and clicked analyze. Then it listed off all the folders and on the bottom it says "All Media" I clicked this and then Clicked "Extract". It lets you pick a folder to then download it to. Worked awesome!! And so simple! Just click the picture for the link :)


Wednesday, April 29, 2015

Make Overs on Garden Statues.

So this deer was at cemetery for the past 10 years (family gravesite) and was in need for some major TLC. So I grabbed it the other day along with a can of clear coat from Meijers.

Ok so this is it before I did anything with it, as you can see it is very sun bleached and has a few cracks and holes... I actually got some very thick glass like spray clear coat for this very reason. I wanted it to hold up well once I was done with it.


For starters I scrubbed it as best as I could (plastic was kinda brittle) and then I covered the holes with some glued on cardboard. 


Then next I started painting!!! I used acrylic paint, first painted it completely brown.. well more of a brown/orange. Then from there I added white and black (after the brown is dry!) and then the eyes last. It turned out great and pretty easy!! I just looked at a picture off the web for guidance of colors and spots :)

The cardboard doesn't look perfect but at least they're not gaping holes anymore. 

I Love what the clear glossy spray coat did for it! Looks great and should last a long time back outside!!! 


Wednesday, April 22, 2015

How To Build an Easy Bird Bath

Found this beautiful large bowl the other day and decided to make it into a bird bath with a removable bowl for easy cleaning.


Also found this plant stand and it was a perfect fit!!


 I just happened to have these old metal hooks from sticking them on my wall during christmas (plastic ones would work too!)


So I super glued them while the bowl was on the stand, so that I knew they were placed correctly.


These hooks are so that the bowl wont slide off. I loved this metal stand because it sticks into the ground and I don't have to worry about it falling over!! Turned out perfectly :)


Have a Bowl already? buy this stand on Amazon for 16$ (click on picture for link)


Buy the metal hooks too $1.25 for a pack of 6! Make sure you peel off sticker part before glueing! 
(click Picture for link to Ebay )


Wednesday, March 18, 2015

Finding Unique Luggage tag

So two weeks ago, Me and my husband went on a Bahamas vacation. It was the first tim in 8 years I had flown... let me just say I am a very organized person and I planned out things to pack for this trip weeks before leaving. However the one thing I forgot to purchase was LUGGAGE TAGS!! So important and its also a very good idea to have something unique attached so that you can spot it easily!
Well i remembered what I was missing at about 3 in the morning and we were leaving for our trip at 5am... I layed there in my bed freaking out a bit. I searched my brain for ideas and what to use and BAM it came to me!!! Old iphone cases!!!! They have the perfect spot inside the case to sharpie your name, address and phone number (or tape a piece of paper inside). They are your own and personalized so that you can easily spot it! They can easily be attached through the camera hole, with a ribbon or string.

IT WORKED PERFECT!!! Me and my hubby were some of the firsts to grab our luggage and go!


Monday, January 12, 2015

How to play Clash of Clans on Mac os x (simplified)

I can NOT fully garuntee this will work with all macs, mine worked however it does crash every once in a while.


Install and play Clash of Clans on Mac OS X:


    1. Download Genymotion and install:
    2. Download VirtualBox for Mac and Install:
    3. Download Genymotion Pre configured virtual device:


Once all are downloaded and apps installed, Open both Genymotion and Virtual box. 

Open Pre configured device by double clicking the 3rd download and follow on screen instructions.  

For more info and other ways to do it - 


Happy Clashing :)


Monday, January 5, 2015

What to do with your unused fireplace!

Create a new look for you unused fireplace!!!


This is what I did for mine! I am a painter, so a little more went into it. But I can give a few pointers to help you duplicate it!! I did black lines since that was the same as my fireplace. try to use the same colors as yours!

This is just some pointers for the bricks!!! Obviously painting a fire is a bit more complicated.lol :) But maybe you can just try and duplicate my colors for that.


First off on the board you need to start with drawing a box like so. This is your guidelines for bricks.

Next you add in the lines for the actual bricks, Us the actaul bricks lines for starting points for your lines. I started from the left to top.


And then the middle and next the right.


Lastly you do the bottom.

Next add in color of your bricks. you might have to go over the lines with black or whichever color you chose.

Then next after you've given your bricks color ad in the dimension of your actual bricks.
Like so.


Once youve finished those you have an "empty" fireplace instead of a board.If your not up for painting fire you could always paint some logs of wood or just a pile of hot ashes! For my ashes i splotched black and gray and then on top bright red. Good luck!

Thursday, May 29, 2014

How to Replace Star N9776 Screen digitizer - Teardown.

This is my beat up and broken phone tablet, its an "Star N9776" or in other words a "Note nock-off". I couldn't find any directions on google how to replace the screen so I thought I better adds some.


Step 1.

Take the back cover off. (it just snaps off). If you can't get it off...then maybe you should stop yourself now.

Step 2.

Take out the 10 philips screws. (I place mine on a magnet board to keep them in order) 

Step 3. 
You should then be able to stick your isesamo (thin metal pry tool) into the side (in between the silver and orange) and pry apart. Its clips that hold it together. Pry from bottom to top (there is a connection at the top you don't want to rip). 


Once you have it like this be very gentle.

Step 4. 
Look for the connection and unpeel it from the plastic (its just stuck onto it). 
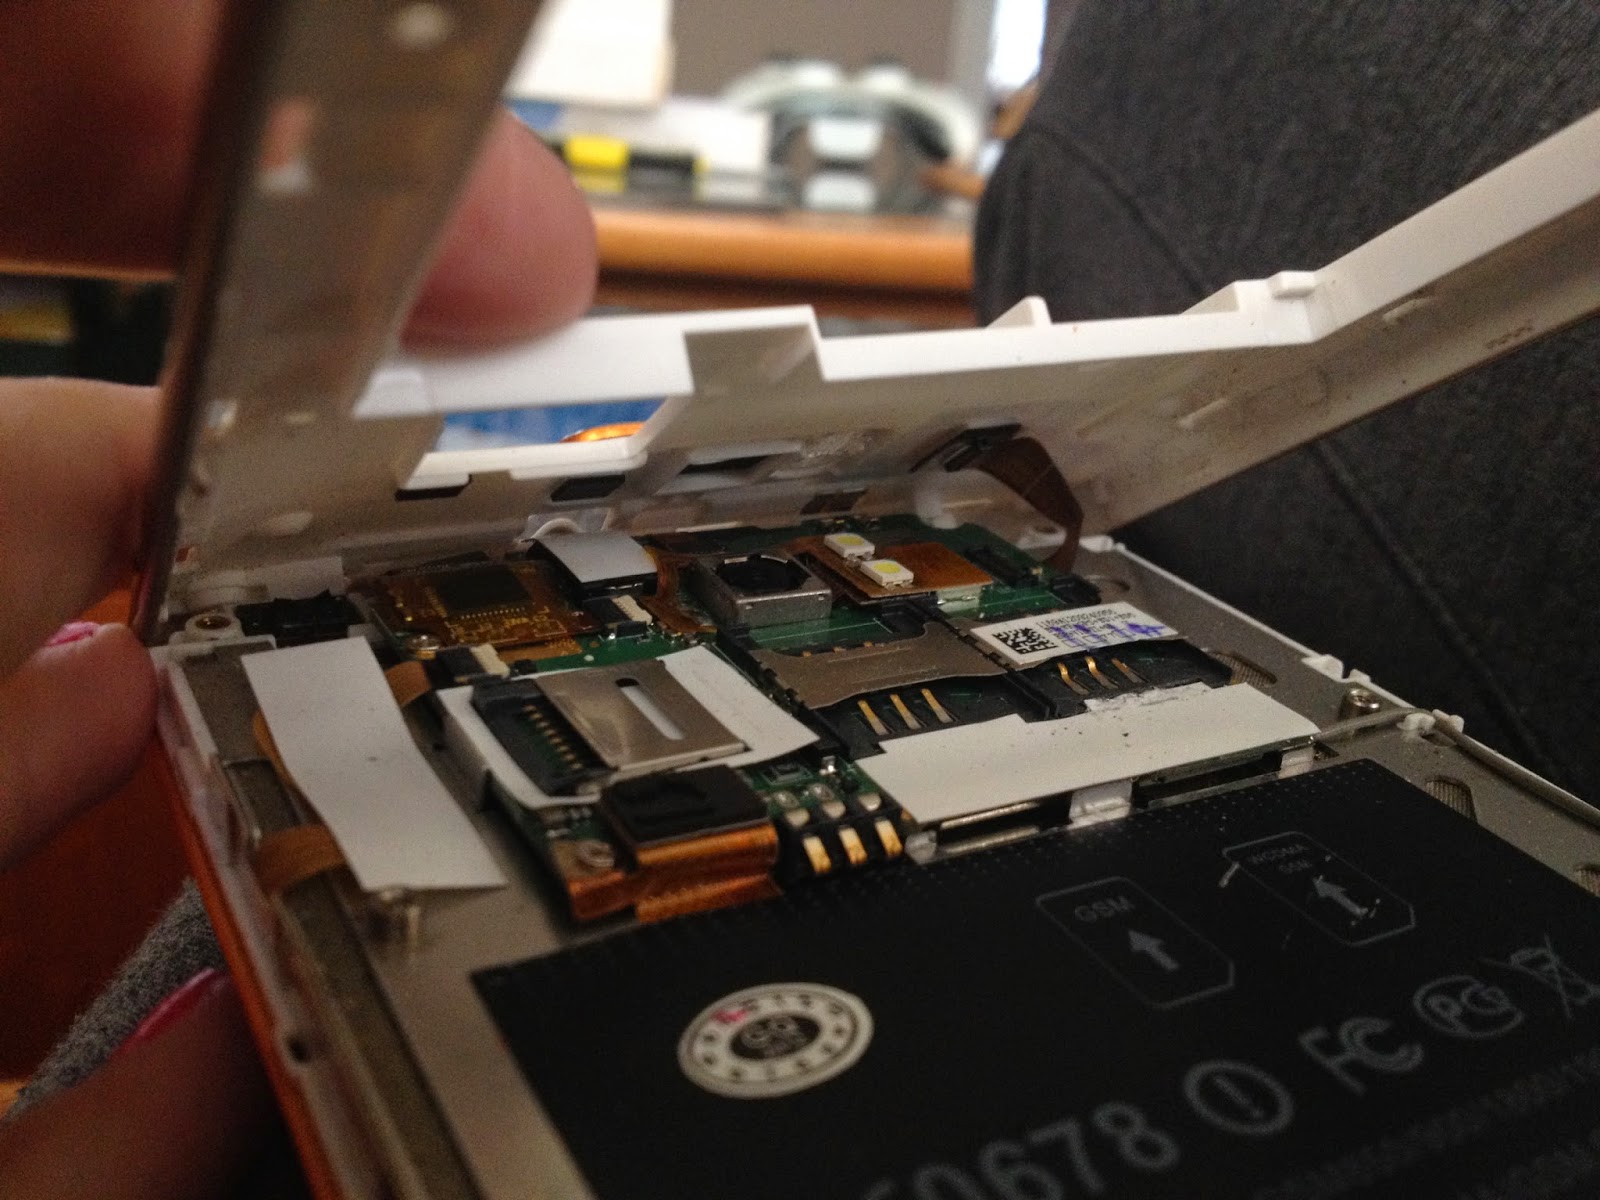


Watch out for your volume buttons don't want to lose those!!!


Step 5. 
You need to disconnect all 8 of these. The two top ones just need to be pulled up out of the plastic. Then the two with white plastic on the ends of them, the plastic needs to be flipped upward before the flex will slide out. The next two are just clipped down so you should be able to gently snap them up with your isesamo.  Lastly there is are two screws, be careful with the one I circled there is a flex cable underneath it. 


Step 6.
Now pick up from the left side and slide it slightly to the left (there is a clip on the right side). It should then lift out.


Step 7.

Next flip your phone back over to the glass, now you need to heat up the glass to help the adhesive become less sticky. you can use a hair dryer, heat gun, or a rice pack. I like using a rice pack because i don't have to worry about burning anything. Usually I put the rice pack in the microwave for  4 min. 
Just set it on it for a couple of minutes, it doesn't take long for the glass to heat up. 


Step 8.
Start prying the glass up, you can either start from the bottom or the side, I find it easier near the volume buttons. Be really careful on the top since the digitizer connection flex is there.


 Gradually you should be able to pry from the bottom up, like this. Again be careful of the top and don't pry that up just yet.


Step 9.
Once you have the glass lifted and all thats left is the top, start gently lifting it away and peel away from  any adhesive, Dont completely lift glass up just yet.. 


Slowly pull the digitizer flex cable out of the slot.


Step 10.
Once you have the glass off, peel the adhesive off either with your fingers or you may have to use your isesamo. 

Then lay some new adhesive along all sides, make sure you not covering needed holes. 


Step 11.
Then you need to pull the metal speaker guard from the old screen and put onto the new one. 


Step 12.
Next VERY gently wipe off your LCD. I used a special cloth I already had, but more than likely you have a yellow one that came with your screen. 

Step 13.
Once your LCD is cleaned off you can peel off the plastic from the inside of your new screen. Then pull off the adhesive tape if you havnt already (so that the sticky side is exposed).

Step 14.

Start placing your screen from the top by first putting the digitizer flex cable through the slot and then placing it down so that it fits where the previous glass was. 

Gradually place screen completely down and then run your fingers down to secure the adhesive seal. 

Thats it! You've installed the new screen, Now just backtrack from step 6 through to step 1 to get it back together. :)