

Step 1.
Take the back cover off. (it just snaps off). If you can't get it off...then maybe you should stop yourself now.

Step 2.
Take out the 10 philips screws. (I place mine on a magnet board to keep them in order)
.png)
Step 3.
You should then be able to stick your isesamo (thin metal pry tool) into the side (in between the silver and orange) and pry apart. Its clips that hold it together. Pry from bottom to top (there is a connection at the top you don't want to rip).

Once you have it like this be very gentle.

Step 4.
Look for the connection and unpeel it from the plastic (its just stuck onto it).
Watch out for your volume buttons don't want to lose those!!!

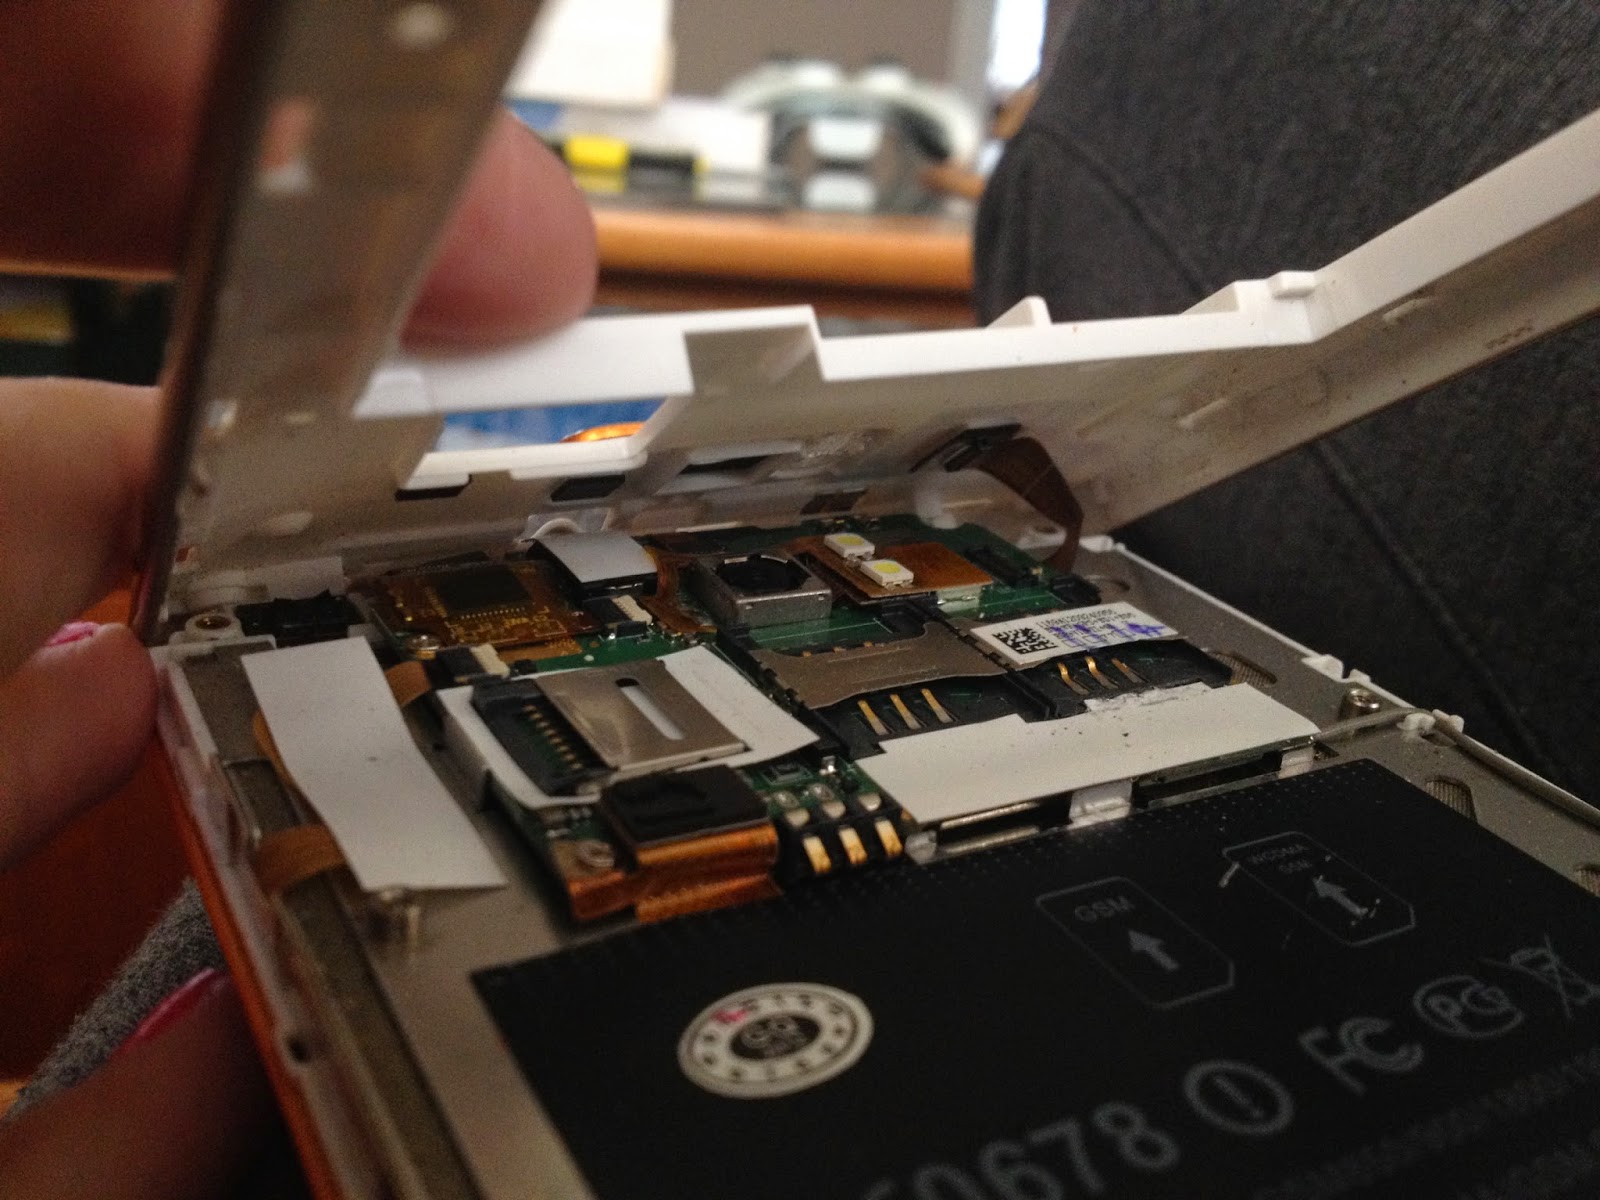
Step 5.
You need to disconnect all 8 of these. The two top ones just need to be pulled up out of the plastic. Then the two with white plastic on the ends of them, the plastic needs to be flipped upward before the flex will slide out. The next two are just clipped down so you should be able to gently snap them up with your isesamo. Lastly there is are two screws, be careful with the one I circled there is a flex cable underneath it.
.JPG)

Step 6.
Now pick up from the left side and slide it slightly to the left (there is a clip on the right side). It should then lift out.


Step 7.
Next flip your phone back over to the glass, now you need to heat up the glass to help the adhesive become less sticky. you can use a hair dryer, heat gun, or a rice pack. I like using a rice pack because i don't have to worry about burning anything. Usually I put the rice pack in the microwave for 4 min.
Just set it on it for a couple of minutes, it doesn't take long for the glass to heat up.


Step 8.
Start prying the glass up, you can either start from the bottom or the side, I find it easier near the volume buttons. Be really careful on the top since the digitizer connection flex is there.


Step 9.
Once you have the glass lifted and all thats left is the top, start gently lifting it away and peel away from any adhesive, Dont completely lift glass up just yet..

.JPG)
.JPG&container=blogger&gadget=a&rewriteMime=image%2F*)
Slowly pull the digitizer flex cable out of the slot.

Step 10.
Once you have the glass off, peel the adhesive off either with your fingers or you may have to use your isesamo.

Then lay some new adhesive along all sides, make sure you not covering needed holes.

Step 11.
Then you need to pull the metal speaker guard from the old screen and put onto the new one.


Step 12.
Next VERY gently wipe off your LCD. I used a special cloth I already had, but more than likely you have a yellow one that came with your screen.

Step 13.
Once your LCD is cleaned off you can peel off the plastic from the inside of your new screen. Then pull off the adhesive tape if you havnt already (so that the sticky side is exposed).

Step 14.
Start placing your screen from the top by first putting the digitizer flex cable through the slot and then placing it down so that it fits where the previous glass was.
Gradually place screen completely down and then run your fingers down to secure the adhesive seal.

Thats it! You've installed the new screen, Now just backtrack from step 6 through to step 1 to get it back together. :)


.JPG)
.JPG)


.JPG)
.JPG)
.JPG)


.JPG)